
When I see people asking about NetBoot on Mac OS X or NetSUS, I often recommend people use BSDPy in a Docker container on Linux instead.
Which usually results in this kind of reaction:

So here is my guide for getting a NetBoot server setup quickly and easily with CentOS 7 and a BSDPy Docker container.
Bare with me, this is a bit of a long post as I’ll be walking you through it step by step.
Getting Started!
Get yourself a copy of the CentOS 7 ISO image, I chose to get the Everything ISO.
I’m going to create the Linux server as a VM in VMWare Fusion 7 on Mac OS X, but use whatever Hyper-Visor you want. Start your VM and begin the install.

When you get to the install wizard. Make the usual choices for your environment date and time, network time server, keyboard and language support.
When you get to Software Selection lets use the default Minimal Install, we will install any extra packages we need manually.
No need to have a super bulky netboot server full of software that we are not going to use.

For the Installation Destination, I make a couple of changes to the partitioning from the default.
Make sure to choose “I will configure partitioning myself” then click Done.

You will be presented with the following dialog box.

Click on the link to create them automatically. You should end up with it looking like this:

Click Done and choose Accept Changes. Now ensure the VM has network connected and specify and hostname if you require.

Begin the Install and set a password for the Root user. We don’t need to create any additional users, so we can leave that blank.

Once complete, Reboot and you will be presented with a login screen:

Configuring the server
Login with the Root user and the password that you set earlier.
First we will disable the Firewall and disable SELinux so that Docker containers are able to connect to the network with out issue.
Run the following commands:
~]# systemctl stop firewalld && systemctl disable firewalld
~]# sed -i -e 's/SELINUX=enforcing/SELINUX=disabled/g' /etc/selinux/config
Now give your machine a reboot so that it starts up with SELinux turned off.
We need to install some extra packages; Docker, and I also prefer to use Nano over Vi for text editing duties so we will include that. If you are behind a proxy server, you will need to tell the package manager (yum) to use your proxy server details.
To do this we simply put the proxy server details into the yum.conf file which is achieved by using the command:
~]# echo "proxy=http://your.proxy.server.com:8080" >> /etc/yum.conf
If you need to provide a username and password you can do that do with:
~]# echo "proxy=http://username:password@your.proxy.server.com:8080" >> /etc/yum.conf
Now lets update our package manager and install docker and nano with the below commands:
~]# yum -y update
~]# yum -y install docker nano

New in Docker 1.5 is the way it handles proxy servers. The Docker docs are here if you are interested:
If you do not require a proxy server, then you can ignore these commands and move on to the next section.
Configuring Docker Proxy Server Settings
Create a directory called: docker.service.d
~]# mkdir /etc/systemd/system/docker.service.d
Create a file called: http-proxy.conf
~]# nano /etc/systemd/system/docker.service.d/http-proxy.conf
Now make sure this file has the following content:
[Service]
Environment="HTTP_PROXY=http://proxy.example.com:80/"
Hit Control-x to exit, and hit Y to save changes.
If you need to provide a username and password for authenticated proxy access, then use the same syntax we used earlier: Eg. http://username:password@server.com:8080
Now just flush changes and restart docker:
~]# systemctl daemon-reload
~]# systemctl restart docker
Now we have Docker installed and configured for proxy servers if required.
Starting Docker Automatically
We need to get the Docker service running and configured to start every time the machine is turned on.
~]# service docker start
~]# chkconfig docker on service docker restart
![]()
Now we can pull down the BSDPy Docker container. The container has a page here, if you are interested. This particular container is one that I have built, feel free to inspect the docker file to see how it was created.
~]# docker pull hunty1/bsdpydocker
Now lets create a place to store our NetBoot images.
~]# mkdir /nbi
Take note of your server’s IP address which you can get from running: ip addr
Your IP address will be next to inet under the name of the ethernet adapter which will probably start with eth or eno or similar. On my machine my IP address is 192.168.69.156 as you can see from this:

If you want to set a static IP for the server then I recommend you follow this guide:
Running the Docker Container
To start the NetBoot server, we have to run our Docker image which creates a Container for it. Think of it like an image is just a template and when we run the template a container gets created and runs our application inside of it.
~]# docker run --restart=always -d -v /nbi:/nbi -p 69:69/udp -p 67:67/udp -p 80:80 -e BSDPY_IP=YourLinuxServerIP --name netboot_server hunty1/bsdpydocker
Now thats a lot of commands, so lets break it down:
Docker Run
~]# docker run --restart=always -d
Basically the above is saying go ahead and run a docker image, if the container exits, like if the linux host was powered off. Then the next time that docker loads (which will be at system startup), it will try to restart this container. The -d flag means run in daemonized mode rather than interactive. This way it runs in the background and doesn’t require any user input or intervention. Just how a service should run
Volumes
-v /nbi:/nbi
The -v flag means volumes, what we are doing here is that we are telling docker to map the directory /nbi into /nbi of the container. This allows our container to have access to /nbi and thus our NetBoot image. Think of it like a shared folder between the host and the container.
Ports
-p 69:69/udp -p 67:67/udp -p 80:80
The -p flag here just maps the ports from the Linux host to the BSDPy container. What we are doing here is basically forwarding all the UDP traffic on ports 69 and 67 from the linux host to our container. We are also forwarding UDP and TCP traffic on port 80 from the linux host to the container. Port 69 is for TFTP and Port 67 is for DHCP and Port 80 is HTTP which is how the client will be netbooting.
Environmental Variables
-e BSDPY_IP=YourLinuxServerIP
The -e flag here is passing an environmental variable to our container. The variable is DOCKER_BSDPY_IP Essentially we need to tell our container what the IP address is of our linux host is so make sure this is set correctly. ie.
-e BSDPY_IP=192.168.69.156
Name of Container
--name netboot_server hunty1/bsdpydocker
The –name flag here allows us to give a name to this running container, you can call it what ever you like. I like to use the function or service the container is providing as the name as it makes it easy to see at a glance what my Linux host is providing. So in the above example I have the name set to netboot_server.
After the name we have hunty1/bsdpydocker this is a reference to the docker image that we pulled down from the Docker public registry earlier. This is the name of the image that we are telling Docker to run and create a container for.
So now run the command and it should come back with the UUID of the Container
![]()
Kind of uninteresting. So how do we see whats happening? Lets see what containers are running on the server:
~]# docker ps -a
![]()
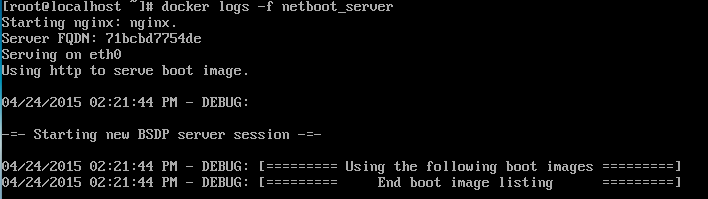
So we can see that the netboot_server container is up and running. To see some logs from the container we can run:
~]# docker logs -f netboot_server
This is kind of like running a tail -f, it gives you the last 10 or so lines of the log file and will live update so you can see events in the log as they happen.
We now have a fully operational NetBoot Server!
You might be wondering great but how do I get it to server a NetBoot.nbi file that I have created? Well there are plenty of ways, we could scp it across, or, a little bit more of a friendly approach is to install Samba, and access the /nbi directory we created earlier via SMB from your Mac.
So lets do that. To exit out of the log view if you are still in it, hit control-c
Installing samba:
~]# yum -y install samba samba-client
Now we need to setup a user account to authenticate to our samba share. I’m going to call my user ‘smbuser’
~]# useradd smbuser
Now we set the password
~]# smbpasswd -a smbuser
Now lets setup samba to share out the nbi directory. First backup the smb.conf file
~]# mv /etc/samba/smb.conf /etc/samba/smb.conf.backup
Now create a new smb.conf file
~]# nano /etc/samba/smb.conf
And ensure it has the following content:
## Minimal SMB Conf file for CentOS 7
[global]
workgroup = MYGROUP
server string = Samba Server Version %v
log file = /var/log/samba/log.%m
max log size = 50
security = user
passdb backend = tdbsam
local master = no
create mask = 0744
force create mode = 0744
directory mask = 0755
force directory mode =0755
inherit permissions = yes

#============================ Share Definitions ==============================

[nbi]
path = /nbi
available = yes
read only = no
browseable = yes
public = no
writable = yes
We can now enable the samba service and fire it up:
~]# systemctl start smb
~]# systemctl start nmb
~]# nmbsystemctl enable smb
~]# systemctl enable nmb
You will need to give your smbuser permissions to the nbi folder, so run
~]# chown smbuser /nbi
Drop your NetBoot.nbi into this share.

Now once it has finished copying over. Go ahead and restart you docker container
~]# docker restart netboot_server
And to check that it has picked up the new netboot image:
~]# docker logs -f netboot_server
-=- Starting new BSDP server session -=-
04/24/2015 03:45:58 PM - DEBUG: Considering NBI source at /nbi/DEC_NetBoot_14D131_v1.nbi
04/24/2015 03:45:58 PM - DEBUG: [========= Using the following boot images =========]
04/24/2015 03:45:58 PM - DEBUG: /nbi/DEC_NetBoot_14D131_v1.nbi
04/24/2015 03:45:58 PM - DEBUG: [=========     End boot image listing      =========]
Go ahead and try to netboot a client device and you should be away!
Congratulations you now have a NetBoot server running in a Docker container on Linux!
Now for bonus points here is a couple of scripts to get you up and running super fast.
Script 1.
This will disable the firewall and SELinux and prompt you to reboot.
| #!/bin/bash | |
| echo "*** Stopping and disabling Firewalld ***" | |
| systemctl stop firewalld && systemctl disable firewalld | |
| echo "*** Firewalld: Disabled ***" | |
| echo "*** Disabling SELinux ***" | |
| sed -i -e 's/SELINUX=enforcing/SELINUX=disabled/g' /etc/selinux/config | |
| echo "*** SELinux: Disabled ***" | |
| echo "" | |
| echo "Ready to reboot? (y/n)" | |
| read input | |
| if [ $input = "y" ]; then | |
| reboot | |
| else | |
| echo "No reboot? Your on your own!" | |
| fi | |
| exit 0 |
Script 2.
This will set everything else up for you. Once complete just upload the netboot image to your server and reboot the linux server (Or just restart the docker container, so it finds the new nbi)
| #!/bin/bash | |
| # Set some variables | |
| samba_user_name="smbuser" | |
| samba_user_password="password" | |
| # This will attempt to get the IP address for the server. YMMV with this, if in doubt, hardcode the IP address of your server here. | |
| my_ip_address=`ip addr | grep "en" | awk '/inet/ {print $2}' | cut -d "/" -f1` | |
| # Install some packages | |
| echo "Installing Packages" | |
| yum -y update | |
| yum -y install docker nano samba samba-client | |
| # Create nbi directory | |
| echo "Creating /nbi directory" | |
| mkdir /nbi | |
| # Enable Docker Service | |
| echo "Enabling Docker" | |
| service docker start | |
| chkconfig docker on | |
| # Pull down the docker image | |
| echo "Getting bsdpy docker image" | |
| docker pull hunty1/bsdpydocker | |
| # Add our samba_user | |
| echo "*** Creating user account for samba share ***" | |
| useradd $samba_user_name | |
| echo -ne $samba_user_password$samba_user_password | smbpasswd -a -s $samba_user_name | |
| echo "*** Setting owner of /nbi to samba user $samba_user_name ***" | |
| chown -R $samba_user_name /nbi | |
| # Setup samba conf | |
| echo "*** Setting up smb.conf file ***" | |
| mv /etc/samba/smb.conf /etc/samba/smb.conf.backup | |
| echo "## Minimal SMB Conf file for CentOS 7 | |
| [global] | |
| workgroup = MYGROUP | |
| server string = Samba Server Version %v | |
| log file = /var/log/samba/log.%m | |
| max log size = 50 | |
| security = user | |
| passdb backend = tdbsam | |
| local master = no | |
| create mask = 0744 | |
| force create mode = 0744 | |
| directory mask = 0755 | |
| force directory mode = 0755 | |
| inherit permissions = yes | |
| load printers = no | |
| printing = bsd | |
| printcap name = /dev/null | |
| #============================ Share Definitions ============================== | |
| [nbi] | |
| path = /nbi | |
| available = yes | |
| read only = no | |
| browseable = yes | |
| public = no | |
| writable = yes" >> /etc/samba/smb.conf | |
| # Enable samba | |
| echo "*** Enabling Samba service ***" | |
| systemctl start smb | |
| systemctl start nmb | |
| systemctl enable smb | |
| systemctl enable nmb | |
| # Start docker container | |
| echo "Starting Docker container: netboot_server" | |
| docker run --restart=always -d -v /nbi:/nbi -p 69:69/udp -p 67:67/udp -p 80:80 -e "TZ=Australia/Sydney" -e BSDPY_IP=$my_ip_address --name netboot_server hunty1/bsdpydocker | |
| # Completes | |
| echo "Setup Complete!" | |
| echo "Upload your Netboot image via the samba share smb://${my_ip_address} then reboot this server when done, or restart the netboot docker container" |

Estimated very good contribution.
I followed exactly. In System Preferences you can see the network drive (Net Install), can even click to boot from the network drive, but when reboot fails to load the network disk.
I tried booting pressing the Alt / Option button but still no network disk is shown.
I tried to boot from the disk into the Recovery but do not see the network drive.
I think the error occurs only when the iMac does not have APIPA IP that is so.
Maybe they can correct this fault would help me or what I suggest
[IMG]http://i59.tinypic.com/22jgp5.jpg[/IMG]
LikeLike
I have the same Problem and it seems that the problem is caused by the wrong ports..
LikeLike
My Centos 7 is running with KVM http://tinypic.com/r/22jgp5/8
LikeLike
I am getting the following error (by the way, I am using DOCKER_BSDPY_IP rather than BSDPY_IP, does that matter because your screenshots are different from your web page):
docker run –restart=always -d -v /nbi:/nbi -p 69:69/udp -p 67:67/udp -p 80:80 -e DOCKER_BSDPY_IP=10.204.132.116 –name netboot_server hunty1/bsdpydocker
Usage of loopback devices is strongly discouraged for production use. Either use `–storage-opt dm.thinpooldev` or use `–storage-opt dm.no_warn_on_loop_devices=true` to suppress this warning.
LikeLike
BSDPY_IP is the correct variable to use, not DOCKER_BSDPY_IP, thats no longer used.
As for the error about loopback devices – that is an issue with using devicemapper on RHEL/CentOS
Heres some good reading about this issue.
http://batmat.net/2015/08/26/docker-storage-driver-dont-use-devicemapper/
LikeLike
Thanks, I fixed it with this site (could you update your images to match your text as it’s a bit confusing, thanks:
http://www.projectatomic.io/blog/2015/06/notes-on-fedora-centos-and-docker-storage-drivers/
LikeLike
This method works well but I was wondering…. we use the Casper Mac Management system – so do I still need to add the netboot server to Casper itself (in Casper -> Computer Management -> Netboot Servers). I assume I don’t because we are using a different method to the NetSUS Jamf appliance so that entry is not required. Would that be correct?
LikeLike
It’s up to you. If you use that feature of Casper then yes you can add your netboot server in there. The type of netboot server is irrelevant, it could be NetSUS, OS X Server or BSDPy. A NetBoot server is a NetBoot server
LikeLike
Okay but what would adding the BSDPy to my Casper Mac Management system achieve? What would it do for us as a company? If there is no real benefit then I won’t bother. Thanks.
LikeLike
Perhaps read up on the Casper documentation to decide if its a feature that provides value to you. Again BSDPy is just a netboot server, its function is exactly the same as the netboot service provided by OS X Server or NetSUS
LikeLiked by 1 person
Thanks for this. Was trying on CentOS 6 bare metal, could not get it working. Moved to CentOS 7,Took 10 minutes following these steps have been up and testing with no issues for past 4 days..awesome
LikeLike
Hi,
I did this on CentOS 7 and I can see the NBI on the log but when it tries to serve them I see this:
08/18/2017 12:28:41 PM – DEBUG: Return ACK[SELECT] to a8:20:66:21:55:6 – 10.11.7.106 on port 68
08/18/2017 12:28:41 PM – DEBUG: –> TFTP URI: tftp://10.11.4.77
08/18/2017 12:28:41 PM – DEBUG: –> Boot Image URI:
I get no boot image URI and doesnt work
here what it serves
08/18/2017 12:26:21 PM – DEBUG: ——- Start Docker env vars ——-
08/18/2017 12:26:21 PM – DEBUG: BSDPY_IFACE: eth0
08/18/2017 12:26:21 PM – DEBUG: BSDPY_PROTO: http
08/18/2017 12:26:21 PM – DEBUG: BSDPY_IP: 10.11.4.77
08/18/2017 12:26:21 PM – DEBUG: ——- End Docker env vars ——-
08/18/2017 12:26:21 PM – DEBUG: tftprootpath is /nbi
08/18/2017 12:26:21 PM – INFO: Server priority: [52, 14]
08/18/2017 12:26:21 PM – DEBUG: Found $BSDPY_IP – using custom external IP 10.11.4.77
08/18/2017 12:26:21 PM – DEBUG: Using HTTP basedmgpath http://10.11.4.77/
08/18/2017 12:26:21 PM – INFO: Server IP: 10.11.4.77
08/18/2017 12:26:21 PM – INFO: Server FQDN: 10.11.4.77
08/18/2017 12:26:21 PM – INFO: Serving on eth0
08/18/2017 12:26:21 PM – INFO: Using http to serve boot image
08/18/2017 12:26:21 PM – DEBUG:
-=- Starting new BSDP server session -=-
08/18/2017 12:26:21 PM – DEBUG: [========= Updating boot images list =========]
08/18/2017 12:26:21 PM – DEBUG: Considering NBI source at /nbi/Casper93.nbi
08/18/2017 12:26:21 PM – DEBUG: Considering NBI source at /nbi/Netboot02062014.nbi
08/18/2017 12:26:21 PM – DEBUG: Considering NBI source at /nbi/Netboot_9.3.1_Retina.nbi
08/18/2017 12:26:21 PM – DEBUG: Considering NBI source at /nbi/LAR-iMAC-10.8.nbi
Thanks
Carmelo
LikeLike
try stopping and restarting the netboot container or even the entire server.
Also how old are the machines you are trying to boot? Try using the option key to bring up the boot picker and select the NBI from there, rather than use the N key at startup.
I’ve found that quite old machines ie pre 2010 machines have some issues with netbooting when there are multiple netboot images available and actually cause this problem you are seeing on the netboot server
LikeLike
I have a similar Problem to Percy Salgado’s. I think it occurs because of the changing Port. Every time my server gets an request the port is changing and its never 68. Can someone help me please? I am running the the Server in Oracle VM.
Thanks
LikeLike
Nice tutorial. But I have problems to boot the image. I set up docker, the container and smb. the image is recongnized and when I hit ALT during boot, I get the netinstall listed. But when I choose the Image, the small globe starts spinning and after a few seconds the mac reboots. I tested it with a 10.13.2 NBI. I tried to set up docker on centos 7 like in this tutorial and, as it didn’t work, I tried on Ubuntu as well. But exactly the same behavior.
The devices I tried to boot up were a iMac from 2009 and a new MacBook. Same behavior on both.
Any suggestions? I created the NetInstall Image twice, to get sure there was no fail while creating the image.
LikeLike
netboot is broken in 10.13
its also deprecated, new machines with secure boot will not allow netboot ie iMac Pro
Start looking at DEP/MDM there will be no other options very soon
LikeLike
Nevermind… Adding -e BSDPY_IFACE made it work for me, even if I have only one interface. 10.13.2 Netboot works perfect. I am not sure why I had to add this since the Images were found before by the clients but just didn’t work, when I didn’t use -e BSDPY_IFACE.
But thanks to mentioning DEP/MDM, when my solution stops working, I will remember your recommendation.
LikeLike
sweet glad its working for you. Perhaps Apple has fixed NB in 10.13 then. I haven’t tested it personally as I’m no longer working with Mac’s, but i’m still in a number of slack groups where a number of admins were having issues netbooting with 10.13. But it might have been the beta or the 10.13.1 release.
LikeLike
Did you run into a conflict with dnsmasq also running on port 67? If so how did you go about resolving it.
LikeLike
Nope. no issues
LikeLike
Hey hatingfruit,
can you please help me. I have followed your instruction, but I have a problem.
The Server returns the ACK[LIST] on the wrong continuously changing port. I don’t see any Boot Image when pressing ALT while booting or in System Preferences.
LikeLike